
 |
| Oozy! |
One of things I love about my family is their love for the homemade and simple. Louie, from the age of two, never wanted a shop bought birthday party, everything, down to the burgers, were hand made at home. Hard work for me at the beginning, but I have since got a routine down pat! Oh yes, and every party had to be held at home :/
This saves on costs, but, it also means creativity and hard work on my part. Luckily for him, and me, I had taught in schools and run Pre-schools for 17 years so had experience at,
1. entertaining and occupying large groups of children and
2. throwing fabulous themes together.
And so the tradition carried on with boys number 3 and 4. In the past week we've had two birthdays, the youngest, and then exactly a week after, the eldest. Turning 4 our youngest went with a Peter Rabbit theme. I had huge ideas, but, on returning from my trip to Australia (blog post coming soon) and battling Jet lag, it was a more subdued affair than originally planned. it was however, still a success.
The eldest was easy. At 22, he'd made his own plans. All we had to do was provide a birthday lunch of his choice (a long standing tradition) and a cake.
My signature cake, which I have tweaked and can say am wholly satisfied with (only within the past 6 months, after years of baking) is what I would like to share with you today. Adapted from a few recipes I came across online including Jamie Oliver' Queen Victoria Sponge, BBC Food Victoria Sponge sandwich and Nigella Lawson' Victoria Sponge
It is a take on the Victorian Sponge. And being the Queen of my castle, I've royally named it
'The Anita Sponge'
Please read all the way through before starting.
The Anita Sponge Cake
Equipment
Electric whisk
Large mixing Bowl
Weighing Scales
Sieve
Measuring spoons
Wooden spoon
Spatula
20cm sandwich tins x2
Greaseproof/parchment paper (tomato, tomatoe)
Baking sheet
Baking rack 1 large or two small
Butter knife
Oven
Timer
Metal Skewer
Plate/cake stand
Ingredients
CakeSoftened salted butter, plus extra for greasing 250g
Fine self-raising flour, plus a little for dusting 225g
Cornflour 25g
Golden Caster sugar 250g
4 Large free range eggs
Zest of 1 Orange
1/2 teaspoon of Caribbean mixed Spice
1 teaspoon of Vanilla Extract
1 teaspoon of baking powder
Icing sugar for dusting
Filling
4 tablespoons of Strawberry conserve
150g of Strawberries (if in season, or just leave them out)
150ml double cream
1/2 a vanilla pod, split lengthways and seeds scraped out
2 teaspoons of caster sugar
How to
Can I just say, before you start, to have a clean and tidy kitchen before you begin is a must. A clear work surface and clean hands. This goes double if you have children helping!Preheat your oven to 190°C/375°F/gas mark 5. Grease two 20cm sandwich tins with butter, line the bottom with greaseproof paper, then dust lightly with flour.
I use an electric whisk and cream the butter and sugar until fluffy and light. Add the eggs one by one using the lowest setting on the mixer to beat in well before adding the next. Before the last egg is mixed, add the vanilla extract and the mixed spice, then fold in the orange zest and both flours. I always add the baking powder to the flours and sift. I've substituted a little flour with cornflour for a lighter cake ever since discovering the concept from Nigella Lawson' 'How to be a Domestic Goddess'.
Divide the cake mix, as evenly as possible, between the prepared cake tins. Spread out well with a spatula and bake for 20 - 25 minutes, or until golden brown and risen. A light push with clean fingers in the middle should prompt a bounce back, or use a skewer, if it comes out clean, your sponges are cooked!
Allow to cool slightly, then carefully turn out on to a baking rack, remove the baking paper and leave to cool completely.
Place one cake upside down on a plate or cake stand; mix the jam in a cup to make it easier to spread then spread onto the cake.
'Et Viola!' 'Bon appetite'
Method in pictures:
 |
| Cream butter and sugar |
 |
| Add eggs individually |
 |
| Spice it up! I'm from the Caribbean, what can I say, everything has a lil spice! |
 |
| Zest! |
 |
| Fold in order to keep the air in the mixture for a light fluffy cake |
 |
| I place my tins onto a baking sheet as it's easier to put in and take out of the oven |


 |
| Cream |
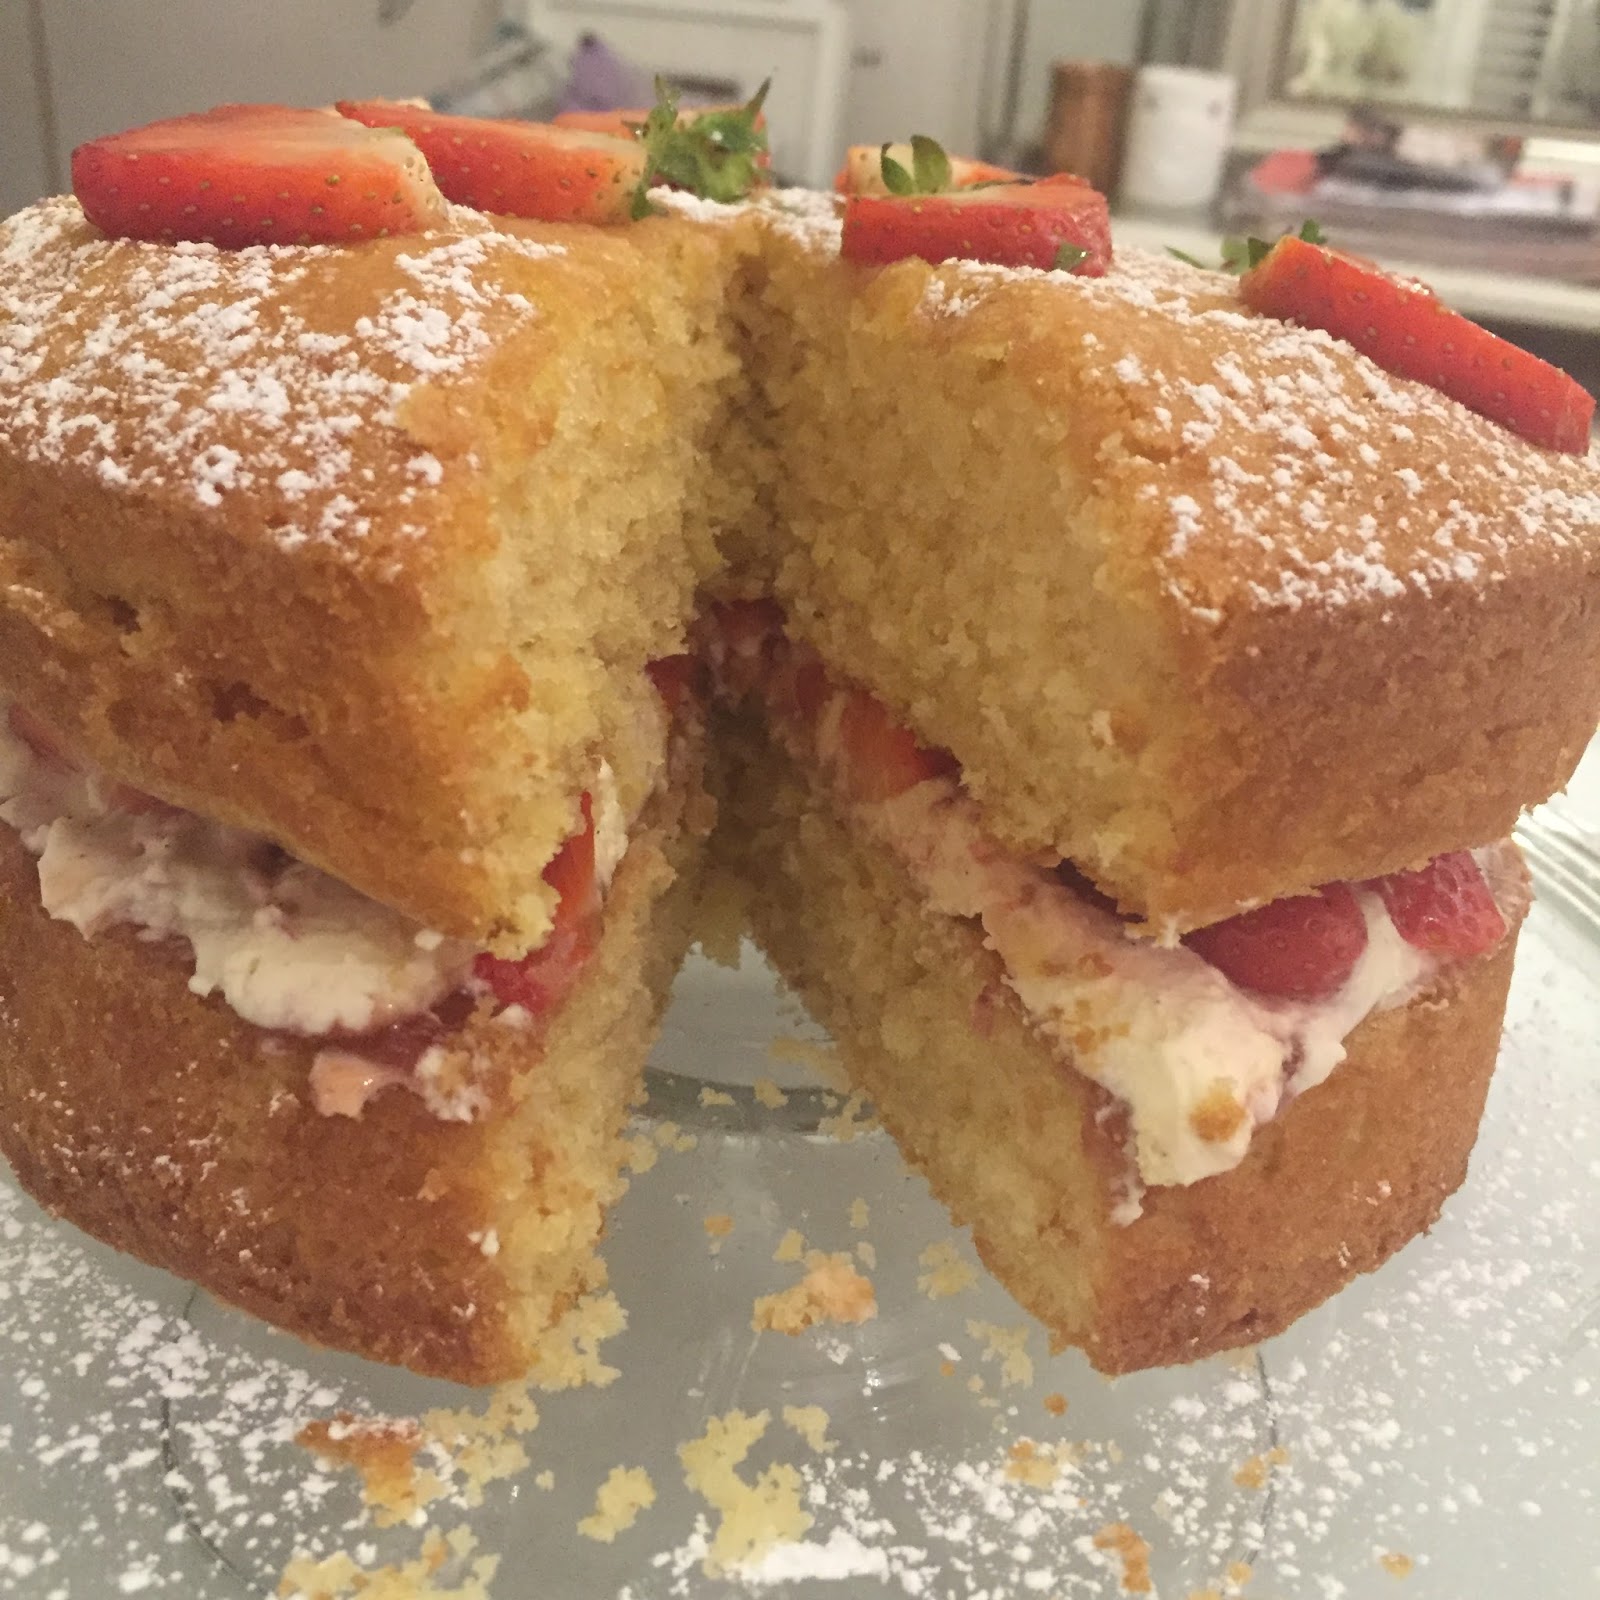 |
| This is one I did at the end of summer, at the end of strawberry season |
This cake is so simple the children can make their own! I hope you enjoy and share your own experiences and experiments in the comments below.
- Tomboy X -
No comments:
Post a Comment